Analytics, Search Console & Google My Business
Follow our step-by-step guidelines to get set up.
Analytics, Search Console & Google My Business
Follow our step-by-step guidelines to get set up.
How to Give User Access in Google Analytics
Google Analytics allows you to grant access to other users so you can share your data with them, or give them more permissions to do things like manage users, edit settings, etc.
Our marketing team may ask to be granted access to your Google Analytics account in order to review your account prior to your campaign or for access throughout the duration of your campaign. Granting access is the most secure way to share your site’s data without having to share your login details.
In this tutorial, we’ll show you to how to grant user access in Google Analytics.
Step 1: Open Your Settings in Google Analytics
The first thing you need to do is to sign in to your Google Analytics account and choose the site for which you’d like to grant access.

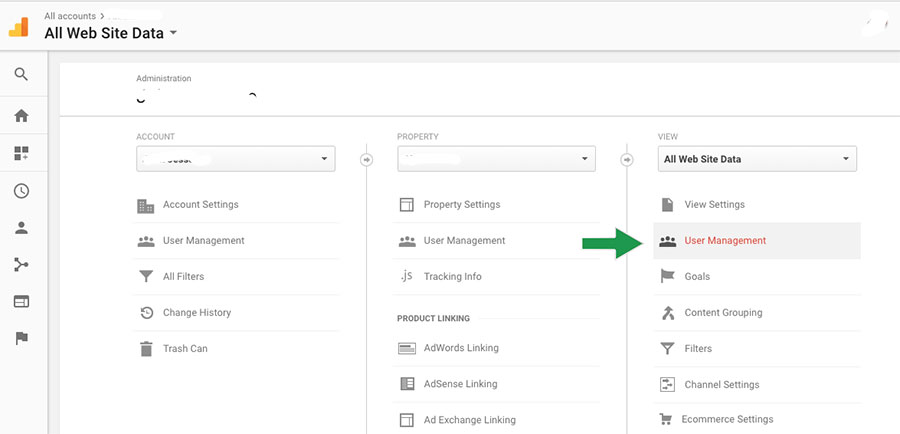
Then, click the Admin option.
Now you’ll notice there’s a User Management link under every column. That’s because there are 3 levels of access: Account, Property and View:
- Account: Allow users to add other users, add additional websites, and link AdWords data.
- Property: Allow users to access the tracking code, adjust the retargeting code and adjust settings on a particular website.
- View: Allow users to view reports, add goals and content groupings.
In this tutorial, we’ll show you how to give someone View access to your website analytics.
To do that, click the User Management link on the right, under the View column.
Step 2: Add Permissions to a User

Click the + icon on the far right side. Now you’ll be asked to enter the email of the user to whom you’d like to give access. You can give permissions to manage users, collaborate, edit or read and analyze. Usually, AMS support will need Read & Analyze access at the beginning.
You can select Notify this user by email to send a notification to each user you’re adding. Then, click Add.
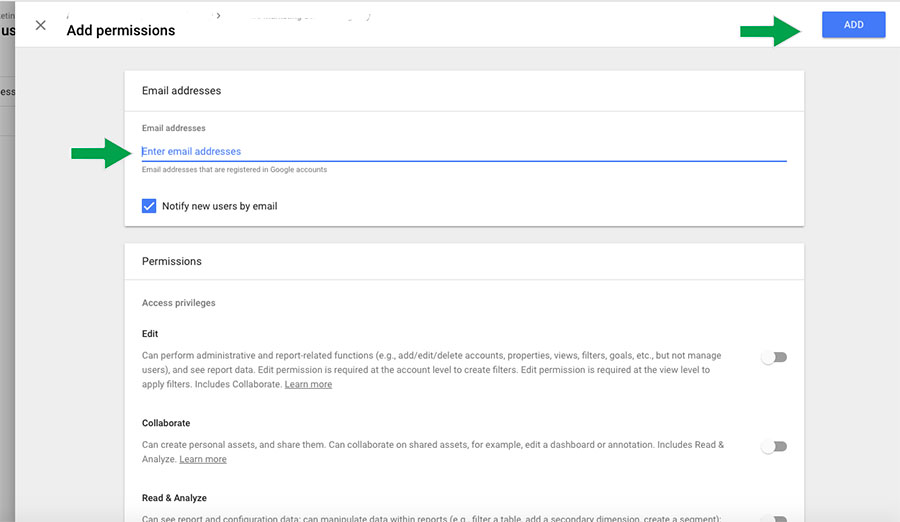
That’s it! You’ve successfully allowed a user to access your Google Analytics account.
How to Give Access to Google Search Console
This section will define how to give a third party access to your Google Search Console Account so other users can view , or if you give them the rights, can edit the account.
Step 1 – Login
Sign into your Google Search Console Account as you normally would if you were going to check on your website’s data.
Step 2 – Manage Site
Once logged in you will see a list of the websites within your account.
As shown below, on the right-hand side of each row you will see a button that says “Manage Property”.
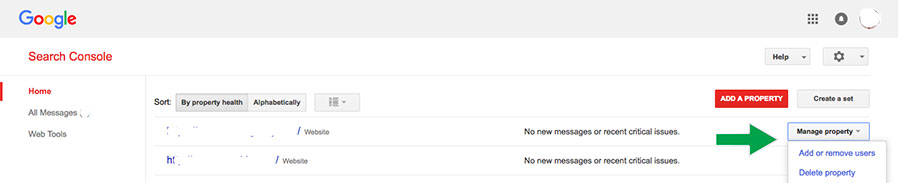
Once clicked a drop down menu will appear. Within that menu click on the “add/remove users link”.
Step 3 – Add User
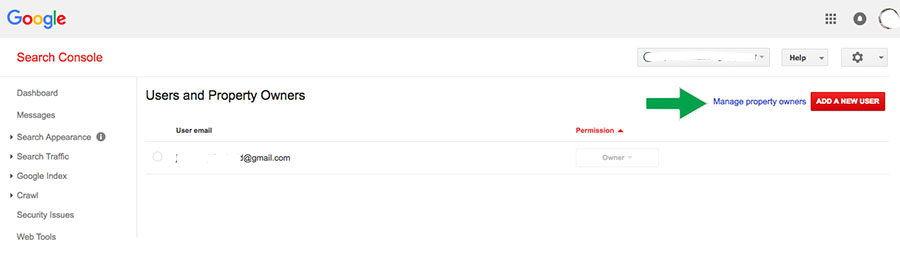
Once you click the “add/remove users” link, the screen below will appear – which lists all users that have access to the data within this account.
Once on this page you will want to click the red button that says “add new user”
Step 4 – Final Step
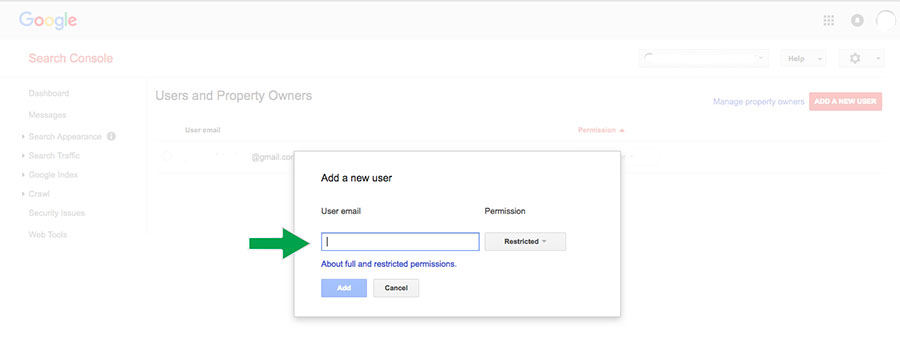
Once you click the “add new user” link, a popup will appear where you will add the users email who you want to give access to.
Much like the Google Analytics step, simply add their email, select which access type you’d like to give them (most will be the default “Restricted”), and click “add”.
Once added, their email address will show in the list of users who have access to that website’s Google Search Console Account.
It’s that easy to give someone access to your Google Search Console data without giving them your password.
Click Users from the menu.
How to Give Access to Google My Business
Google My Business is a Google product used to manage Google Business Location pages and Google Business Brand pages. To provide access to your Google My Business account:
Step 1: Login
Simply login to https://www.google.com/business/ with the Google account that has ownership access to your business’ Google Business page property.
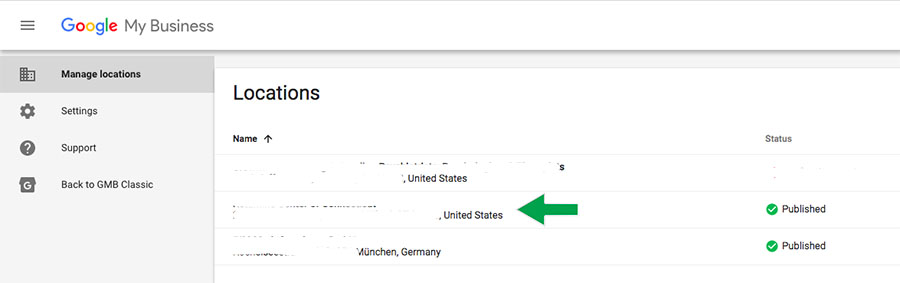
Step 2: Manage Properties
If you have two or more listings, click on the listing you’d like to manage. And then on Users in the left hand menu.
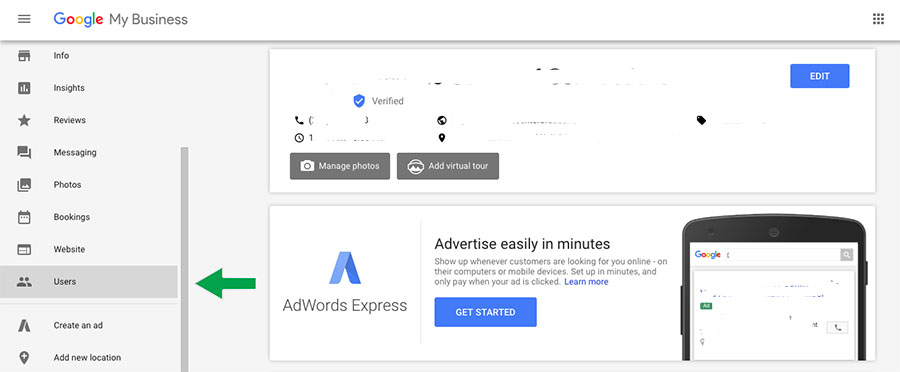
In the new window that opens, click the menu in the upper left hand side.
Step 3: Manage Users
Click Users from the menu.
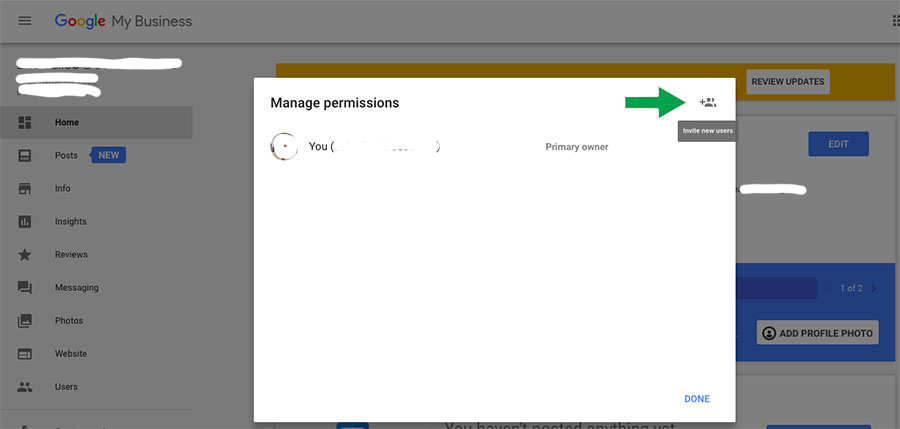
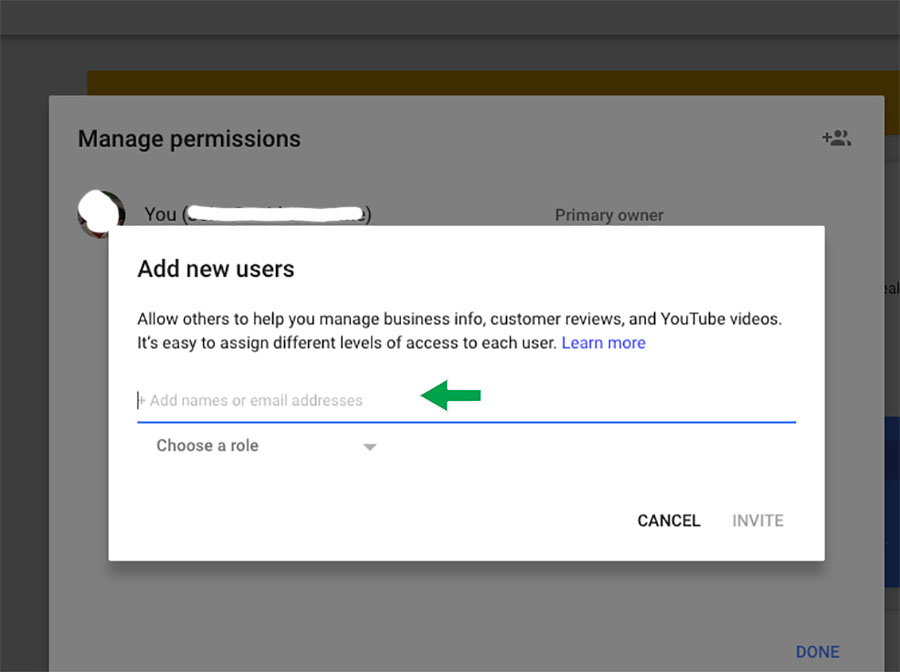
Step 4: Invite New Managers
In the top right corner, click the “Invite new managers” icon. Under “Invite new managers”, type in the account *******@ams-agency.com to give access to our marketing team. Ensure the role is “Manager” for full access. Click “Invite”.
Step 5: Notify Us
Notify your contact at AMS that the invite has been sent, as they will need to click the link in the Gmail inbox.
How to Add an Admin to Tag Manager
To add users to a Tag Manager account:
-
- Click Admin.
- In the Account column, select User Management.
- Click
.
- Select Add new users.
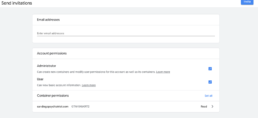
- Enter one or more email addresses.
- Set Account Permissions. User is selected by default, and this level allows the user to view basic account information. Please select Administrator so we have the ability to create new containers and modify user permissions for accounts and containers.
Click Invite. Each invited user will receive an invitation to use the container.